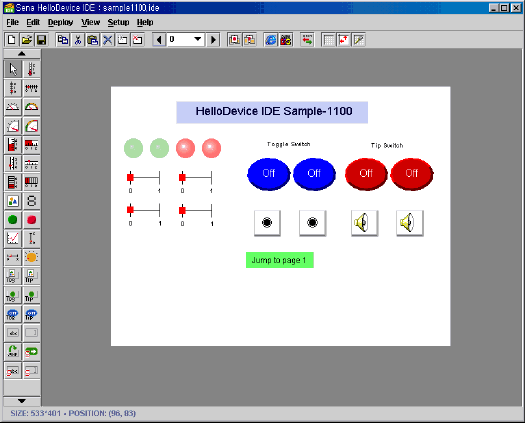
When the design is finished, that is when you have finished composing your custom applet on the design panel using various components and have assigned appropriate properties to each of components, the next step is to deploy the design as an application.

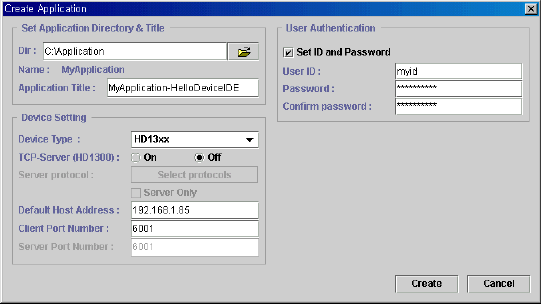
Choose "Make application" from "Deploy" menu or click "Make application" button on the tool bar. A dialog box titled "Create Application" will pop up.

Dir
Select
directory where the every required files will be saved.
Application's name is "MyApplication" and is not supposed to be changed.
Device Type
Choose a device type of HelloDevice between 1100, 1200 and 13xx. Port number is
6001 for HelloDevice and is not supposed to be changed.
TCP-Server (HD1320)
This menu is enabled by choosing HD13xx from the above 'Device type' menu.
Select 'on' to make this application work as a server. When this application
is a server, you need to define and assign receive serial protocols that this
server will accept. The server protocols should be chosen from 'receive protocols'
that are already exists on the protocol list of currently editing '.ide' file.
Please read the end of this section for details. If 'Server only' button is checked, the application will
not check the network connectivity at the start up.
Default host Address
Set an IP address to which it will check the connectivity initially. This can be changed
anytime in the runtime. Leave this field blank if you do not want to check the
connectivity
to any device at the start up. Client port number is remained editable for the
case of connecting to other devices than HelloDevice. The client port number
must be 6001 if you are making an application for HelloDevice product family.
Server port Number
When this application is a server, specify on which port it will listen to the
client's connection request.
User Authentication
You can set an ID and password so that only authorized user can access this
applet. The user ID and password should be free of blanks.
When the user authentication is set, the application will check the user ID and
password at the start up like below.

Then, you have to submit User ID and password that are specified at the
deployment time to enter the main screen.
Totally eight files will be created in the selected directory : appletser.jar, audio.jar, image.jar, MyApplication.bat, myapplication.jar, support.jar, ide16.gif, idelogo.gif.
Note : In case you didn't use any components which use image files such as GreenLed or ImageDisplay, "image.jar" file will not be created. Also if you didn't set any components' audio alarm property 'on', "audio.jar" will not be generated.
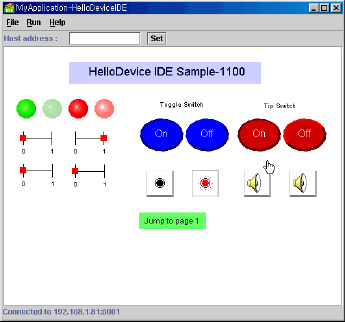
Double click on the 'MyApplication.bat' file to execute the application.

When you deploy an application as a server, you can choose multiple 'server
protocols'.
The server protocols are the protocols that this server can validate and accept.
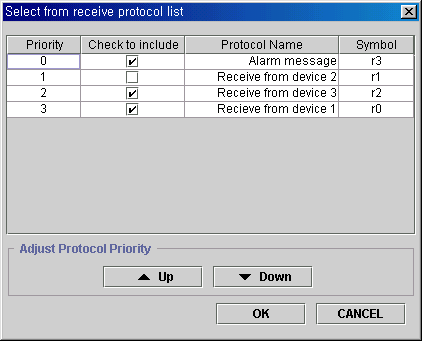
This is an example protocol selection dialog
 .
.
When some data has received, the server application checks if the data is an
'Alarm message' (r3) according to the priority order. If not, the server checks
'r2'. and finally 'r0'. 'r1' is not included as server protocol so the server
never checks 'r1'. You can adjust protocol priority by pressing 'up' and 'down'
button.
When you have chosen only one server protocol, the server is able to process a
'stream input data' by intelligent buffer management. Stream input data means
continuous incoming data without a pause. Without this buffer management, the
received stream data fails in data verification and will be ignored because the
server does not know where is the start and the end of a valid data block.
Note that this buffer management will not work when you have chosen multiple
server protocols.